
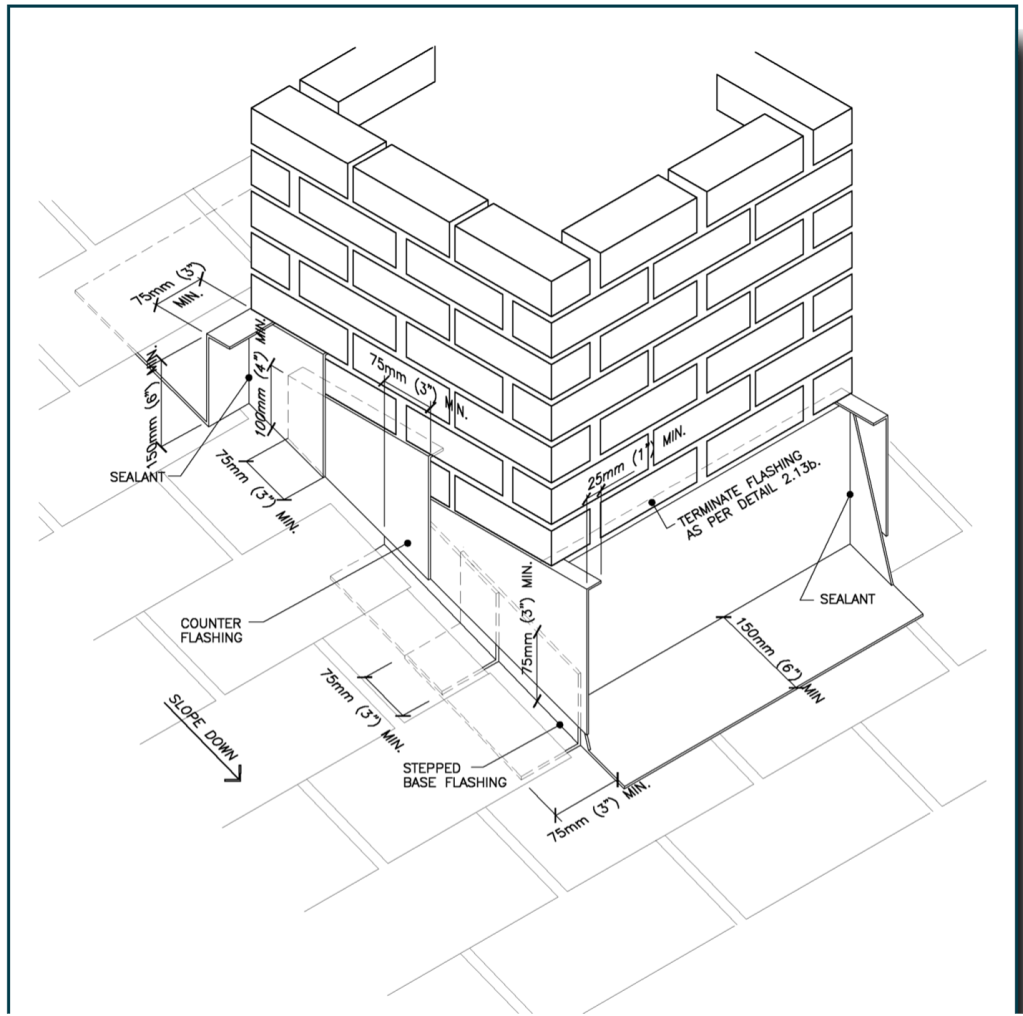
The Canada Mortgage and Housing Corporation provides some of the best advice on building that can be found. One in their construction series has been on my shelf since its publication in 1998—Flashings. One drawing caught my eye, drawing 2.13a. It shows about the ugliest flashing job I’ve ever encountered. Don’t EVER flash a chimney (or dormer, or skylight, or any rectangular protrusion through a sloped roof) so it looks like this. Those pointy corners have no place on a roof, or on any construction, even if it is far removed from the playspace of children. OSHA would not approve of those corners, nor would an average building owner.
But the drawing was an inspiration to me. Here’s why.
First, any roof flashing job involves the intersection of three planes, at the four corners of an opening. Three planes meet at a point. And a point is a hole. And the hole leaks water. Let’s call that point the three-point. There are four of these points on a chimney flashing. You can fill the three-point hole with lead, solder, sealant, bitumen, silicone, crud, pook, putz or anything, and chances are the three-point hole will leak, sooner or later.
Second, flashing creates a water channel that funnels rainwater from the entire area uphill from the chimney, so it becomes a stream of concentrated water on either side of the flashing.
The problem with traditional flashing is that it directs the concentrated water stream right over the four three-point holes. Drawing 2.13a inspired me, because it removed the three-point holes from the water stream. Look closely. At the top, the hole is against the chimney, while the water stream is outboard by 3 inches. At the bottom, the three-point hole is three inches upstream of where the side flashing deposits its water. It’s ugly. But it’s really dry.
Can we keep the dry and lose the ugly? I think we can.
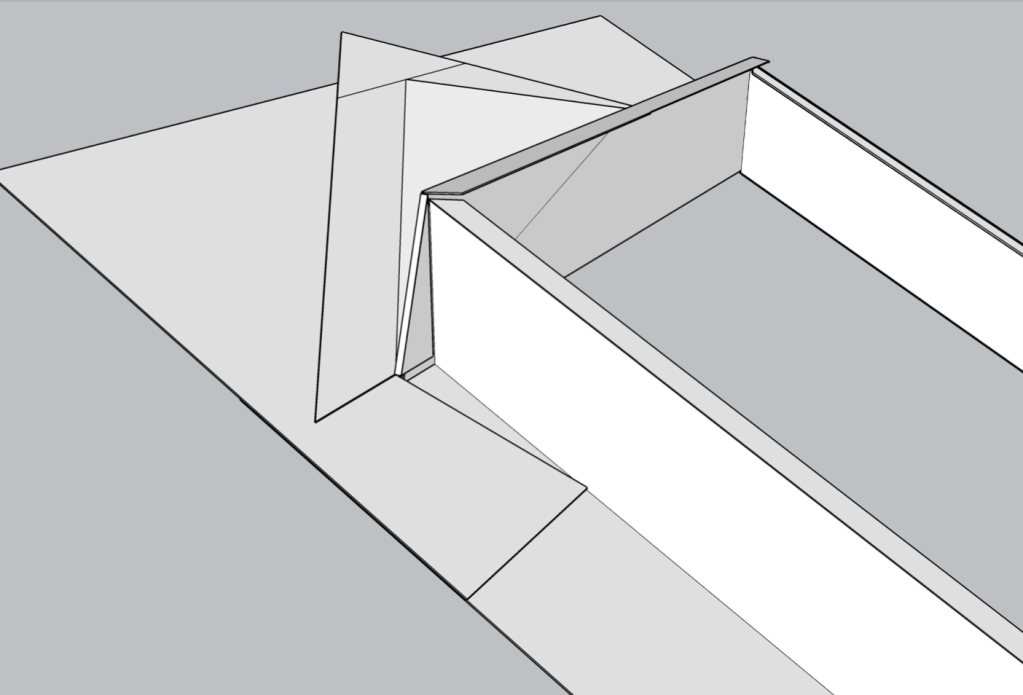
Create sloped wings that extend outward at the top, by a few inches. Create sloped wings that extend downward at the bottom, by a few inches. Done. A dab of sealant at each three-point, just for old time’s sake.
The wings need to be rather robust. The drawings below show how the wings can be made that comprise four thicknesses of sheet metal. At each corner, the flashing (subflashing) contains the wing shape. Then the counterflashing is bent to cover the wings on two sides, with a nice smooth rounded edge. These drawings show continuous counterflashing, but step flashing works just as well.


Here is a short video of the steps involved. (Hope this works.)
You may note that drawing 2.13a shows no cricket, just a continuous piece extending outward from the chimney on each side, and uphill on the deck. This should work fine provided the bend is smooth, and provided the shingles are terminated sufficiently uphill that they are unaffected by standing water.
This may be common practice in your area, or perhaps not. I don’t get around like I used to, to judge current practice. If so, congratulations. I welcome your comments.

Leave a comment